Dreamy's Delights

It's all about the food!

More Fermentation!! Like more cowbell only tastier

More cowbell! This just needs more cowbell! I mean FERMENTATION, this just needs more FERMENTATION. I have to admit that I think I’m completely hooked on fermenting things. We already knew I was thrilled with cheese making and all other things cooking related. This just adds another skill to my list of things I like to do. 😀  The really lovely thing is that it’s not nearly as work intensive as cheese making, which is an all day process (12+ hours sometimes) that has to be carefully monitored. Fermentation is MUCH easier, hooray!

Today’s batch of fermentation is a blend of gold beets, celery root, rainbow carrots, broccoli, cauliflower, onions and garlic. I asked for ideas in a Facebook group on food preservation and they suggested curry. I wasn’t sure about it at first but as I put everything together, the smell of the vegetables spoke to me of curry. I happened to have a good amount of Maharajah curry powder from Penzeys spices. It’s a mild curry with good depth of flavor which I thought would go wonderfully with this.

currypickledrootveggiesOct82014

You can see the beautiful color from the saffron threads in the curry powder. By the time it’s done everything should have a gorgeous golden color. These are half gallon mason jars with air locks on top. You can’t see them but there are clear glass weights on top of the veggies.

Everything will sit in the jars overnight and tomorrow evening I’ll check to make sure enough liquid has been released or if I need to add some brine. The smell is FANTASTIC! Even after washing my hands several times I still smell like curry lol.

I had originally thought about making my own curry blend with whole spices. Finally, the fact that the curry powder needed to be used up combined with the fact that I was getting super tired won the day. I think I’m going to be very glad that I did it this way.

The jar on the left didn’t have enough of the original blend to be full so I added a cabbage on top. I’ve still got a couple of cabbages left so I’ll add them to the sauerkraut pot tomorrow when I’m not so tired. 😉

To the right of the jars you can see a plum and some apples.. I’ve got apples, plums and pears which are going into a jar with a nice pour of Captain Morgan’s Spiced Rum. Because you can never go wrong with fruit and booze. That will be tomorrow’s project though. I’m pretty much done for today. 🙂


Leave a comment »

Sauteed Mixed Greens with Lemon-Parmesan Cream Sauce (and some bacon)

Every week Jene and I get a box of organic produce from Full Circle. They’re a company that delivers locally sourced, in season produce each week. You can go on their website and pick from a selection of things you want in your box each week and shop for extras as well. The best part is that it’s delivered to your front door early in the morning and you wake up to a box full of yummyness. I say “produce” but they also offer dairy products and meats. The offerings vary based on the season and what’s available. I love it and highly recommend trying it if it’s available in your location.

So.. anyway… Last week I got a couple of nice bunches of rainbow chard. I decided I’d just saute them with some bacon and onions, then toss in some heavy cream and parmesan cheese to finish it off. It came out quite good. This week I took the recipe a bit farther.

Recipe

1/2 lb bacon, chopped

1 medium onion, chopped

3 bunches of chard

1 bunch of kale

1 small bag of baby spinach

2 lemons, juiced

1/3 cup heavy cream

3/4-1 cup grated parmesan (if you’re using pre-grated you will want to use a bit less because fresh grated is fluffy)

1 TB dried dill

1/2 tsp white pepper (you can use black)

salt to taste

In a large pot, over medium heat, saute the bacon until crispy-ish. Add the onions and continue to cook until translucent.

Meanwhile, rinse the greens thoroughly but don’t dry them completely. The water will help cook them. Roughly chop the card and kale, removing the tough center stem from the kale.

When the onions are tender, add the kale to the pot first, then the chard. Add the lemon juice, pepper and dill. Don’t add the spinach yet. Let the greens cook, stirring them frequently until they appear to be softening. NOW you can add the spinach. Cook just long enough to wilt the spinach a bit.

Pour the cream into the post and stir well. Finally stir in the parmesan a bit at a time. If you add it all at once it can make a big clump that is slow to melt. Taste and season with salt if desired. The bacon and parmesan make it fairly salty on its own.

There you have it… the fancy version. If you want it even simpler, use bacon, onion, any of the three types of greens, salt and pepper and cream with parmesan. The steps are the same, just fewer ingredients. 🙂


Leave a comment »

Fermented pickles – First attempt

I know I’ve been talking about making lacto-fermented pickles for over a year now. Well, I’ve finally got myself together enough to give it a try today. I went to three farmer’s markets yesterday AND bought a second pickling crock just to make sure I could get a batch done before the end of the cucumber season. The second crock was because I needed to get a new batch of sauerkraut going.

Now, that I think of it.. A note on eating fresh sauerkraut: This stuff is beyond awesome for keeping your inside ticking along regularly. Due to the medications I take, this is important lol. So since I’m down to just one quart left of the last batch, it’s time to make more. This is the same dill/onion combo but with daikon radish added.

Ok, back to my pickle preparations… The first part of the prep work was doing some reading up on the process. One of the things I found out was that a key ingredient in making crisp pickles is tannin. Main sources are fresh grape leaves, oak leaves and black tea. An interesting note is that spices like cloves, cinnamon and bay leaves also contain tannins, which explains why you find them in pickling spice blends. I don’t have a handy grape vine or oak tree but I DO have some black tea so I’m going to put a couple of tea bags in the bottom of the crock.

The next step is prepping the cucumbers. Since I bought them yesterday and it had probably been a few days since they were picked, I have had them sitting in water all afternoon to perk back up. Next step, I finished washing them and then trimmed off the blossom end. It turns out there are enzymes in the blossom that can eat out the center of the pickle leaving it hollow. Huh, never knew THAT either.

Once the cucumbers were prepped, the tea bags go in the bottom of the crock along with some garlic, pickling spice and fresh dill. I didn’t have fresh dill seed heads but I did have some dried seed heads I used in combination with fresh dill sprigs.

Once everything was in the crock I added a brine of about 5.4% salinity. This works out to about 1.8 ounces of salt to quart of water. I use weight here because salts come in so many different grain sizes. It’s important not to use regular table salt or salts with iodine or anti-caking agents added. The only ingredient on the box should be “salt.” The additives can create off colors, flavors and cloudy brine. Icky.

In my reading I found that some people recommend adding a bit of a “starter” to get the ferment going. Either sauerkraut juice or boiled wine or boiled vinegar. The wine or vinegar get boiled to kill off any yeast that might still be active. Personally, living in the rich environment of the San Francisco Bay area, I don’t feel a need to use as starter. My previous batches of sauerkraut have done just fine so I’m confident the pickles will too.

While I was filling the crock I decided a tiny bit of heat would be ok so I tossed in a few dried hot peppers. I’m not sure what type of peppers I used but they’re pretty hot as far as I’m concerned. Jene will disagree but too bad lol. Here’s a picture of what it looked like when I started filling up the crock.

picklecrockOct52014

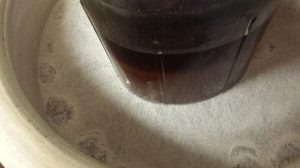
I layered in more fresh dill as I filled the crock with the cucumbers. I like my pickles really dilly. I’m not sure there’s enough garlic. I might have to add more in the future after I taste my first pickle. These pickles will sit on the counter for several weeks before they’re ready. Just as with sauerkraut, I’ll check them every day or two and skim off any bloom that forms. Here’s what it looks like with the plate and weight on top.

picklecrockfinished


I will really have to keep a close eye on this because it’s just a bit overfull. I’ll give it a day or two two see if there’s any settling and if not, I’ll pull the top layer of cucumbers off. The pickles should be covered with at least an inch of  brine, which they are, but it’s a very close thing lol. I know I’m excited about seeing how these come out in the next few weeks. 🙂

Leave a comment »

Sauerkraut Take 2 – Update and a recipe, sort of

I’ve had a couple of friends on Facebook ask me what recipe I used to make my second batch of kraut. I figured I’d better share it here too so I don’t forget what I did in the future.

I basically read several recipes online and combined them. The current batch is 9 lbs of thinly sliced cabbage, 5 oz of kosher salt (DO NOT USE TABLE SALT. The iodine and anti clumping agents can kill the ferment), 2 red onions, 1 lb of grated carrots and a big bunch of fresh dill.

I have a 5 gallon ceramic pickling crock that I got from my mom. I had a piece of food grade plastic custom cut to fit inside so that I could use that to press down on the kraut rather than a plate which didn’t fit quite right. You can buy crocks online or find them at hardware stores with the canning supplies. According to what I’ve read online you can also use a plastic container or a mason jar.

This is the primary website I used. http://www.wildfermentation.com/making-sauerkraut-2/

So I sliced up the cabbage and put it in a large bowl and then tossed it with the salt. I also sliced up the onions and grated the carrots but kept them separate from the cabbage. I sprinkled some salt on the onions and carrots too.

Then I started layering it all into the crock. I put some sprigs of dill in the bottom, then a third of the cabbage. I tamped it down firmly using a potato masher. Then I put in half the onion, half the carrot and more dill. Cabbage, onion, carrot, dill, cabbage, dill. I tamped down each layer firmly. The reason for this is to help break down the cell walls to release the juice faster.

After I had everything in the crock I let it sit for 24 hours to let it release the juices. Then I put the piece of plastic in the crock and a heavy weight on top. In my case, I’m using a half gallon mason jar full of honey lol. You want the juice/brine to cover the plate/plastic disc by at least 1 inch. If not, you can dissolved 1.5 TB of salt in water and add that brine to the crock. DO NOT USE TAP WATER!! It has chlorine that can kill the fermentation process.

Cover it and let it sit at room temperature. After a few days you will start to see a white scum form on top of the brine. THIS IS OKAY! You just skim it off. A yeasty smell is OKAY. That just means it’s fermenting. In fact, right now, my kraut smells like the onion/dill bread I like to make lol.

This is a quote from the webpage I linked above talking about the scum that forms…

“Skim what you can off of the surface; it will break up and you will probably not be able to remove all of it. Don’t worry about this. It’s just a surface phenomenon, a result of contact with the air. The kraut itself is under the anaerobic protection of the brine. Rinse off the plate and the weight. Taste the kraut. Generally it starts to be tangy after a few days, and the taste gets stronger as time passes.”

Some of the reading I’ve done says that Kraut should ferment for 6-8 weeks because that’s how long it takes to form the really good probiotics. I stopped my first batch at 3 weeks because that’s when I thought it tasted good. I might let this second batch go longer.

Once you decide it’s gone long enough, you can scoop it into clean quart mason jars and put it in the fridge. It will last many months in the fridge and will also keep fermenting at a slow pace.

So that’s what I’ve done. I used a bit more salt than the recipe at wildfermentation suggests but that’s because it’s summer and it needs extra salinity to protect against bad molds.


This picture shows the bloom on top of the brine.                                                          This picture shows it after I’ve skimmed the bloom.
sauerkrautpostskim sauerkrautpreskim

Leave a comment »

Sauerkraut – Take 2

Well, after roughly three weeks of fermenting, I pulled the sauerkraut out of the crock. I got about 3 quarts out of the two heads of cabbage I used. Tane stopped by last night and I asked her if she wanted some. I had her taste it first to make sure it was ok. After sealing the jar back up to send home with her, I turned my back and when I looked at her again she was eating another big bit of it. I took this to mean that it was good lol.

So I had acquired another three heads of cabbage and decided to make another batch last night. I also decided to jazz it up a bit. The cabbage is layered with red onion, carrots and dill. I put a layer of dill on the bottom, cabbage, onion, carrot, dill, cabbage, onion, carrot, dill and a last layer of cabbage. Slightly less than 24 hours later it already smells good.

Now, I have an OLD fermenting crock. Unlike some of the newer crocks, it doesn’t have a lid or weights. The last batch, I used a plate with a half gallon jar of honey on top for the weight. The problem was that the plate wasn’t quite big enough. Fortunately, we have a business called TAP plastics nearby. I had Jene get me a 9″ diameter circle of food grade plastic cut. It fits in the crock perfectly and then I can use my jar of honey for the weight. Now I just get to wait for 2-3 weeks before it’s done.

My next project will most likely be fermented pickles. I’m excited to be trying all this new stuff with fermentation. 🙂

Leave a comment »

Sauerkraut – Take 1

Last year, my mom gave me a beautiful fermentation crock that she used when I was growing up. Since then I’ve been meaning to use it for all sorts of things. I’ve actually managed to use it once to make some short fermentation pickles. BUT! I started a bunch of sauerkraut a couple of weeks. I tasted it last night and it’s coming along beautifully.

The recipe for sauerkraut is pretty easy. Shred the cabbage, toss it with roughly 3TB of salt per 5lbs of cabbage. Then tap it down into the crock. You want to tamp it pretty hard so that it releases more moisture. Cover the crock with a towel and let it sit for a day. Then check it to see how much liquid has been released by the cabbage. Place a weighted ceramic plate on top to press the cabbage down. If the liquid covers the plate by at least an inch, cover the crock with a towel and set it aside. If the water doesn’t cover the plate, add a brine made of 1 tsp salt to 1 cup of water until it covers the plate by one inch.

After you have the cabbage in the brine, you get to be patient and wait. Check it every couple of days and skim off any scum that forms on the top. I’ve done that a couple of times now. Then last night I tasted it. It’s very mellow at this point. According to the reading I’ve been doing, the flavor gets sharper as it continues to ferment. So we’ll let it sit for another couple of weeks.

I have to say… I was actually really nervous about tasting the sauerkraut last night. I’ve never been 100% comfortable with lacto-fermentation. However, I’ve also resolved that I’m not going to NOT do something just because there’s a bit of an ick factor. So far, I’m quite pleased 🙂

Leave a comment »

Chile-Lime Roasted Corn on the Cob

I made this for a party tonight and it was so popular I promised to post the recipe. So here it is!

Recipe

9 ears corn on the cob, husked

1 stick unsalted butter

1 large lime, juiced

1 TB chile power

2 tsp ground cumin

2-3 tsp kosher salt

aluminum foil cut into 12-15 inch lengths

If you have time, soften the butter to room temperature. If you don’t have time, you can soften/melt it in the microwave. You don’t want it hot, just soft enough you can easily mix in the lime juice and seasonings.

So, juice the lime, add the lime juice, chile powder, cumin and salt to the butter. Mix thoroughly. Slather on the ears of corn. Roll the corn up in the foil. You can then grill it or roast it in the oven depending on whether or not you have the grill in use for something else. I’ve been known to roast it in the oven when I just want the corn without firing up the grill.

The seasonings can be adjusted for preference. If you want it spicy, put in a bit of cayenne pepper.

I’m glad everyone enjoyed this so much tonight!

Leave a comment »

Garlic Mashed Potatoes

This is one of those side dishes that sounds easy to make and IS if you think about what you’re doing. Believe it or not, it took me several years to find just the right way to make them. I tried roasting garlic and stirring it in, chopping garlic and stirring it in and then finally, ran across a recipe where you boil whole garlic cloves with the taters and then mash them in. Talk about a cross between an “AH HA!” and a “DOH!”

So the first step is to get some potatoes. Now that you’re standing in the store staring at the potatoes, you realize “Oh! There’s more than one kind of potato!” Most people are most familiar with the standard Russet potato. It’s got a slightly rough, brown skin and is used for things like baked potatoes all the time. However, you’ve also got red potatoes, white potatoes and gold potatoes. Each one has a slightly different flavor and texture. My personal favorite is a gold potato. It’s creamier like a red potato but not quite as soft. It’s got a thinner skin like a red which makes it perfect for leaving the skin on during mashing. Everyone has their own little preferences. My dad swears up and down that the only potato worth eating is a russet. I think he’s missing out lol. And in case you want to get really brave, you can also find purple potatoes and other “heirloom” varieties. Be prepared to shell out some big bucks but it’s fun sometimes.

Ok, so you’ve picked out your potatoes of whatever flavor. The next step is to prep them for cooking. If you’re using russet potatoes you want to peel them first. If you’re using red skin, white or gold potatoes you can leave the skins on. Just wash them really well then chop them into chunks and put them in a pot large enough so that you can cover them with liquid and they don’t boil over. Add several peeled cloves of garlic (about 1 large clove per pound of potatoes.)

This is where you can get creative. Nothing in the rules says you have to use water to boil your potatoes. I am currently boiling them in beef stock. I’ve also used bacon fat as part of my boiling liquid in the past too. You can add herbs to the water too. This is a chance to add some different flavors and play around with your food. And you can always stick with water if that’s what you have handy.

Once you have your potatoes, garlic and liquid in the pot, place it on the stove over medium high heat. Let it come to a boil and simmer until the potatoes are tender but not falling apart. I’m sure there’s some sort of time guideline out there but I just stick a fork in a chunk of potato. If the fork slides in easy, they’re done. If not, they boil a bit longer.

Once the tater chunks are tender, drain off the liquid. I just put a colander in the sink and pour everything out of the pot. Set the pot a cool burner or a trivet. The following is for about 3 pounds of poatoes:  Start with a 1/2 stick of butter and put it in the bottom of the pan. Then put the drained potatoes back into the pot. Grab some heavy cream and pour in about 1/2 cup. Use a potato masher to mash everything into a creamy consistency. Add a bit more butter and cream if you need to. Season with salt and pepper.

This is another area of personal preference. Jene prefers his potatoes super smooth and silky. I like mine a bit chunky. Do whatever you like to make them the way you want them. Taste test frequently as you go along so that you know they’re rich and buttery. Enjoy!

Leave a comment »

Caprese Salad

Caprese Salad is almost the most basic thing you can make. It has a whopping five ingredients (seven if count salt and pepper). What makes MY caprese salad amazing is that I’m using mozzarella that I made myself and basil that I grew myself. Later this summer, I’ll even be able to use my home grown tomatoes. How’s that for home made! lol

So the recipe is really simple. Slices of mozzarella cheese layered with a basil leaf and a slice of tomato, topped off with either olive oil or a balsamic vinegar reduction (or just the vinegar out of the bottle if you’re lazy like me).  Sprinkle with a bit of salt and pepper if you choose. I don’t but Jene loves lots of black pepper on his. 🙂

To me, this recipe is the epitome of summer decadence. If you’re lucky, you can eat it with tomatoes that are so fresh from the vine that they’re still warm from the kiss of the sun.

A note about the balsamic vinegar reduction. Reducing the vinegar will give you a thick, syrupy sauce to make graceful and elegant zig zag lines across your salad. It also refines and concentrates the flavor. If I were serving this for a party, I would make the reduction. When it’s just Jene and I and just a couple of bites worth, I don’t bother. 🙂

And here’s a lovely picture of my salad that I’m about to eat!capresesalad

You can see a tiny little corner of basil leaf sticking out from the top right bit. It’s lovely to be able to wander out onto the desk and pick a couple of basil leaves for this. I’m growing Genovese Basil and African Blue Basil. This particular one is the African. It’s milder than the Genovese which makes it rather nice for this dish. The basil flavor isn’t quite so over whelming. Enjoy!

Leave a comment »

Roasting Veggies for Other Uses

This isn’t really a recipe per se but more of a way to help eliminate a problem in certain recipes.

Those of you who have tried my chicken and broccoli recipe are aware that the broccoli leaves a watery residue in the bottom of the pan. It’s not icky, I just find it annoying and it waters down that luscious cheese sauce.

Last week I decided to put together a simple casserole using some leftover ham, rice, eggs, milk, cheese, broccoli and mushrooms. I knew the broccoli and mushrooms would leave liquid behind as they cooked so I decided to try and circumvent the problem.

Admittedly, this dirties some extra pans but I’ve never been shy about making a mess of the kitchen lol. Jene is blessedly patient with me and just sighs and cleans up after me.

So… I preheated the oven to 500F. I put about 12 ounces of frozen broccoli on a cookie sheet and lightly drizzled it with olive oil. I could have just tossed the sliced mushrooms on the sheet at this point and called it good. However, I wanted the mushrooms to have some extra flavor so I took another step with them.

Mushrooms went into a saute pan with a tablespoon of butter, a 1/4 cup of freeze dried shallots and a splash of white wine. When they had released most of their water, but not all. I added them to the sheet pan and spread them evenly among the broccoli.

Then I put the whole thing in the oven and roasted them for about 10 minutes (maybe 15, I wasn’t watching the clock). I pulled them out when the broccoli was still firm and bright green but starting the caramelize. At this point, the moisture had been cooked off and the mushrooms had released the last of their moisture.

The results were excellent. There was no wateriness in the casserole at all. It came out with tender veggies and not the least soggy. In addition, the roasting process added another layer of flavor. I will be doing this roasting process again when I make Chicken and Broccoli later this weekend.

And just because some people might wonder… here’s a rough recipe for the casserole I made. I didn’t measure anything so please forgive me for it being a big vague.

Ham, Veggie and Rice Casserole Stuff

5 cups diced ham (this was leftover from a ham I’d baked earlier that week)

5-6 cups cooked rice

6 eggs (i think)

1/2 – 1 cup milk

2-3 cups grated cheese (I used colby jack but cheddar would work well too)

10-12 ounces sliced mushrooms

12 ounces frozen broccoli

1/4 cup freeze dried shallots (or 2 fresh shallots finely minced)

Preheat the oven to 350F. Grease a 9×13 pan. Prepare the broccoli and mushrooms as described above. Mix everything except the eggs, milk and cheese together in a large bowl. Whisk the eggs, milk and cheese together in a separate bowl, then mix into the rest of the ingredients. If your rice is freshly cooked and still hot, mix fast so that the eggs don’t curdle. Mix in some black pepper or other spices as you choose. I used Penzeys Mural of Flavor for seasoning. It doesn’t really need salt because of the ham.

Spread the mixture into the baking dish and bake for about 30 minutes or until everything is bubbly and it starts to brown on top. I didn’t actually look at a clock to see for sure how long this was.

For someone who’s supposed to be sharing recipes, I’m not very good at writing them down!

Leave a comment »