Dreamy's Delights

It's all about the food!

Sauerkraut Take 2 – Update and a recipe, sort of

I’ve had a couple of friends on Facebook ask me what recipe I used to make my second batch of kraut. I figured I’d better share it here too so I don’t forget what I did in the future.

I basically read several recipes online and combined them. The current batch is 9 lbs of thinly sliced cabbage, 5 oz of kosher salt (DO NOT USE TABLE SALT. The iodine and anti clumping agents can kill the ferment), 2 red onions, 1 lb of grated carrots and a big bunch of fresh dill.

I have a 5 gallon ceramic pickling crock that I got from my mom. I had a piece of food grade plastic custom cut to fit inside so that I could use that to press down on the kraut rather than a plate which didn’t fit quite right. You can buy crocks online or find them at hardware stores with the canning supplies. According to what I’ve read online you can also use a plastic container or a mason jar.

This is the primary website I used. http://www.wildfermentation.com/making-sauerkraut-2/

So I sliced up the cabbage and put it in a large bowl and then tossed it with the salt. I also sliced up the onions and grated the carrots but kept them separate from the cabbage. I sprinkled some salt on the onions and carrots too.

Then I started layering it all into the crock. I put some sprigs of dill in the bottom, then a third of the cabbage. I tamped it down firmly using a potato masher. Then I put in half the onion, half the carrot and more dill. Cabbage, onion, carrot, dill, cabbage, dill. I tamped down each layer firmly. The reason for this is to help break down the cell walls to release the juice faster.

After I had everything in the crock I let it sit for 24 hours to let it release the juices. Then I put the piece of plastic in the crock and a heavy weight on top. In my case, I’m using a half gallon mason jar full of honey lol. You want the juice/brine to cover the plate/plastic disc by at least 1 inch. If not, you can dissolved 1.5 TB of salt in water and add that brine to the crock. DO NOT USE TAP WATER!! It has chlorine that can kill the fermentation process.

Cover it and let it sit at room temperature. After a few days you will start to see a white scum form on top of the brine. THIS IS OKAY! You just skim it off. A yeasty smell is OKAY. That just means it’s fermenting. In fact, right now, my kraut smells like the onion/dill bread I like to make lol.

This is a quote from the webpage I linked above talking about the scum that forms…

“Skim what you can off of the surface; it will break up and you will probably not be able to remove all of it. Don’t worry about this. It’s just a surface phenomenon, a result of contact with the air. The kraut itself is under the anaerobic protection of the brine. Rinse off the plate and the weight. Taste the kraut. Generally it starts to be tangy after a few days, and the taste gets stronger as time passes.”

Some of the reading I’ve done says that Kraut should ferment for 6-8 weeks because that’s how long it takes to form the really good probiotics. I stopped my first batch at 3 weeks because that’s when I thought it tasted good. I might let this second batch go longer.

Once you decide it’s gone long enough, you can scoop it into clean quart mason jars and put it in the fridge. It will last many months in the fridge and will also keep fermenting at a slow pace.

So that’s what I’ve done. I used a bit more salt than the recipe at wildfermentation suggests but that’s because it’s summer and it needs extra salinity to protect against bad molds.


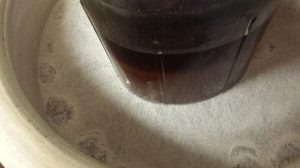
This picture shows the bloom on top of the brine.                                                          This picture shows it after I’ve skimmed the bloom.
sauerkrautpostskim sauerkrautpreskim

Leave a comment »

Sauerkraut – Take 2

Well, after roughly three weeks of fermenting, I pulled the sauerkraut out of the crock. I got about 3 quarts out of the two heads of cabbage I used. Tane stopped by last night and I asked her if she wanted some. I had her taste it first to make sure it was ok. After sealing the jar back up to send home with her, I turned my back and when I looked at her again she was eating another big bit of it. I took this to mean that it was good lol.

So I had acquired another three heads of cabbage and decided to make another batch last night. I also decided to jazz it up a bit. The cabbage is layered with red onion, carrots and dill. I put a layer of dill on the bottom, cabbage, onion, carrot, dill, cabbage, onion, carrot, dill and a last layer of cabbage. Slightly less than 24 hours later it already smells good.

Now, I have an OLD fermenting crock. Unlike some of the newer crocks, it doesn’t have a lid or weights. The last batch, I used a plate with a half gallon jar of honey on top for the weight. The problem was that the plate wasn’t quite big enough. Fortunately, we have a business called TAP plastics nearby. I had Jene get me a 9″ diameter circle of food grade plastic cut. It fits in the crock perfectly and then I can use my jar of honey for the weight. Now I just get to wait for 2-3 weeks before it’s done.

My next project will most likely be fermented pickles. I’m excited to be trying all this new stuff with fermentation. 🙂

Leave a comment »

Sauerkraut – Take 1

Last year, my mom gave me a beautiful fermentation crock that she used when I was growing up. Since then I’ve been meaning to use it for all sorts of things. I’ve actually managed to use it once to make some short fermentation pickles. BUT! I started a bunch of sauerkraut a couple of weeks. I tasted it last night and it’s coming along beautifully.

The recipe for sauerkraut is pretty easy. Shred the cabbage, toss it with roughly 3TB of salt per 5lbs of cabbage. Then tap it down into the crock. You want to tamp it pretty hard so that it releases more moisture. Cover the crock with a towel and let it sit for a day. Then check it to see how much liquid has been released by the cabbage. Place a weighted ceramic plate on top to press the cabbage down. If the liquid covers the plate by at least an inch, cover the crock with a towel and set it aside. If the water doesn’t cover the plate, add a brine made of 1 tsp salt to 1 cup of water until it covers the plate by one inch.

After you have the cabbage in the brine, you get to be patient and wait. Check it every couple of days and skim off any scum that forms on the top. I’ve done that a couple of times now. Then last night I tasted it. It’s very mellow at this point. According to the reading I’ve been doing, the flavor gets sharper as it continues to ferment. So we’ll let it sit for another couple of weeks.

I have to say… I was actually really nervous about tasting the sauerkraut last night. I’ve never been 100% comfortable with lacto-fermentation. However, I’ve also resolved that I’m not going to NOT do something just because there’s a bit of an ick factor. So far, I’m quite pleased 🙂

Leave a comment »

Stuffed Red Bell Peppers

Edited October 6, 2014: I realized that something was missing… In an effort to kick up the flavor a bit I added a tablespoon or so of dried mustard powder. Definitely getting closer.. I think it needs some parmesan cheese next time.

The store had some really nice red bell peppers on sale so I bought a bunch. Then I had to figure out what to do with them. After mulling it over, I decided on stuffed peppers.

Recipe

6 large red bell peppers

1.5 lbs ground beef

1 cup finely minced fresh mushrooms

1 cup finely diced celery

1 cup finely diced onion

2 TB bacon fat or butter

2 TB fresh basil, minced and divided

1 cup diced tomatoes w/juice (I used canned)

1/2 cup ketchup

salt and pepper to taste

Preheat oven to 350F. Grease a 9×13 baking dish.

Melt the bacon fat in a large skillet. Add the mushrooms, onions, celery and one TB of basil. Cook until the veggies are tender.

Put the ground beef in a bowl, add the veggies once they are cooked. Add the rest of the basil, the tomatoes, ketchup, and salt/pepper to taste. Mix everything thoroughly.

Cut the top of the peppers off and remove the cores. If the bottoms are uneven, cut off just enough that the peppers will sit evenly in a baking dish. Rinse the peppers.

Stuff the peppers mounding up the filling just a bit at the top. Place in baking dish. Bake about 45-60 minutes.


StuffedBellPeppers


Leave a comment »

Chile-Lime Roasted Corn on the Cob

I made this for a party tonight and it was so popular I promised to post the recipe. So here it is!

Recipe

9 ears corn on the cob, husked

1 stick unsalted butter

1 large lime, juiced

1 TB chile power

2 tsp ground cumin

2-3 tsp kosher salt

aluminum foil cut into 12-15 inch lengths

If you have time, soften the butter to room temperature. If you don’t have time, you can soften/melt it in the microwave. You don’t want it hot, just soft enough you can easily mix in the lime juice and seasonings.

So, juice the lime, add the lime juice, chile powder, cumin and salt to the butter. Mix thoroughly. Slather on the ears of corn. Roll the corn up in the foil. You can then grill it or roast it in the oven depending on whether or not you have the grill in use for something else. I’ve been known to roast it in the oven when I just want the corn without firing up the grill.

The seasonings can be adjusted for preference. If you want it spicy, put in a bit of cayenne pepper.

I’m glad everyone enjoyed this so much tonight!

Leave a comment »

Mustard-Dill Wet Rub

Last week Jene brought me a double pack of boneless pork shoulder from Costco. I turned one into carnitas (I may have gotten close to having perfected that one) and decided to do a wet rub on the other before smoking it. It came out awesome so I though I’d share 🙂

Recipe

9 oz mustard (I used dijon but I’m sure you could use just about any type you wanted)

4 oz turbinado sugar

1/4 cup dill weed

1/4 cup salt

1 TB ground celery seed

1 TB onion powder

1 TB garlic powder

1 1/2 tsp black pepper


Put all ingredients in a bowl and mix thoroughly. Spread on meat.


It’s obviously a really easy recipe. Ideally you would let it marinate overnight but I forgot and wound up smearing it on and cooking it right away. It’s still good even when it doesn’t get to sit. I would use this on chicken, pork, and/or seafood. For the mustard and sugar the measurement is given in weight because it was easier to put it on a scale than try and use measuring cup.

Leave a comment »